

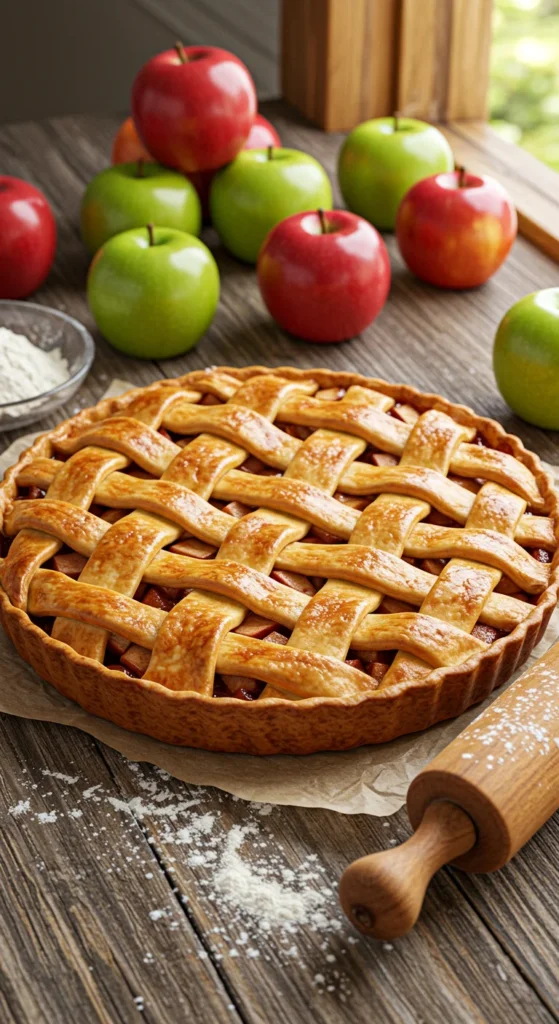
There’s nothing quite like the aroma of a freshly baked pie filling your kitchen — buttery crust, warm spices, and bubbling fruit that make everyone’s mouth water. Whether it’s a holiday gathering or a cozy weekend dessert, a perfectly baked pie can turn an ordinary meal into a memorable event. The secret? It’s all in the details — from your dough to your bake time. Let’s walk through how to bake pies that not only taste heavenly but look picture-perfect, too.
Step 1: Start with the Perfect Crust
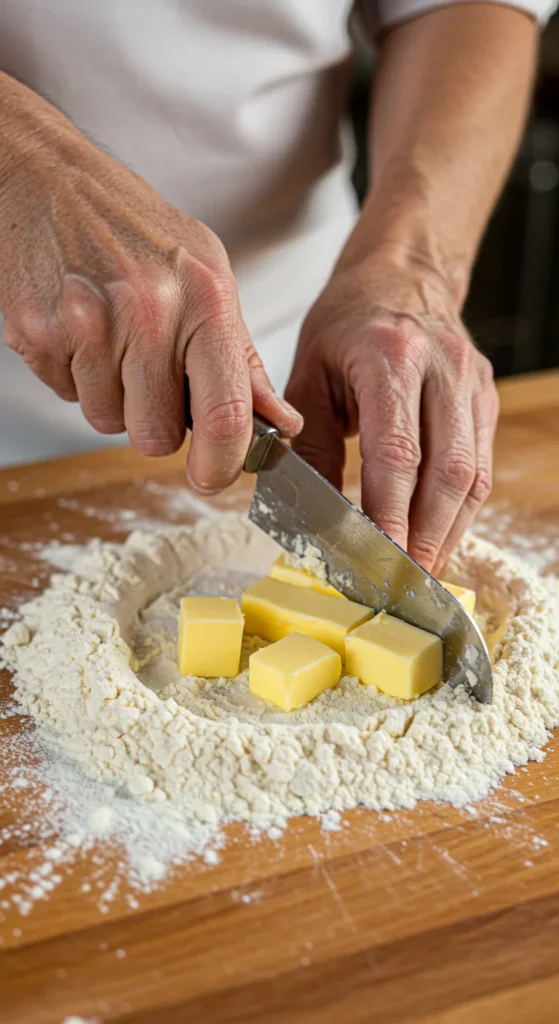
Your pie crust is the foundation, and it sets the tone for everything else. A flaky, buttery crust can make or break your dessert.
- Use cold butter and ice water — the colder, the better. This keeps the fat from melting too quickly and creates those irresistible layers.
- Don’t overmix your dough. Stop once it starts to clump together — overworking makes it tough.
- Chill the dough for at least 30 minutes before rolling. This helps prevent shrinkage while baking.
Pro Tip: If you struggle with sticky dough, roll it out between two sheets of parchment paper for easy handling.
Step 2: Master the Filling
The heart of your pie lies in its filling — fruity, creamy, or nutty, it’s where flavor truly shines.
- For fruit pies: Mix your fruit with sugar, cornstarch (or flour), and a pinch of salt. The starch thickens the juices so your pie isn’t soggy.
- For creamy pies: Make sure your custard or cream base is smooth and lump-free before pouring it into the crust.
- Balance sweetness: Taste your filling before baking. Fruits vary in sweetness, and you can adjust sugar accordingly.

Pro Tip: Add a squeeze of lemon juice or a pinch of spice like cinnamon or nutmeg to bring out the natural flavor of the filling.
Step 3: Assemble Like a Pro
Now comes the fun part — putting it all together!
- Roll out your chilled dough until it’s about 1/8 inch thick.
- Gently lay it over your pie dish, pressing lightly into the corners.
- Trim any excess dough and save it for decorations or a lattice top.
- Add your filling evenly, making sure not to overfill.
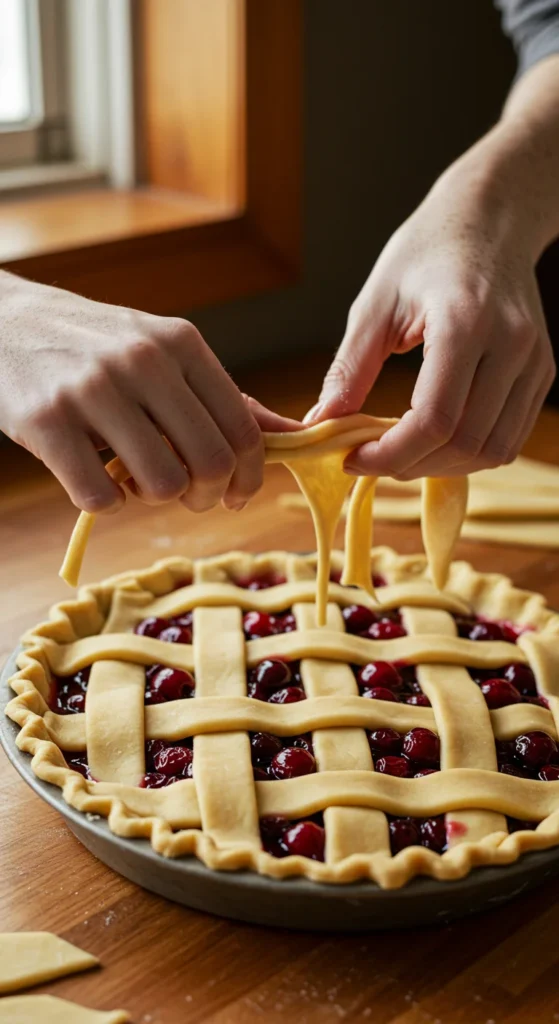
For a picture-perfect finish: Brush the top crust with an egg wash (one beaten egg + a tablespoon of milk or water) for a glossy golden shine. You can also sprinkle a little sugar on top for sparkle and crunch.
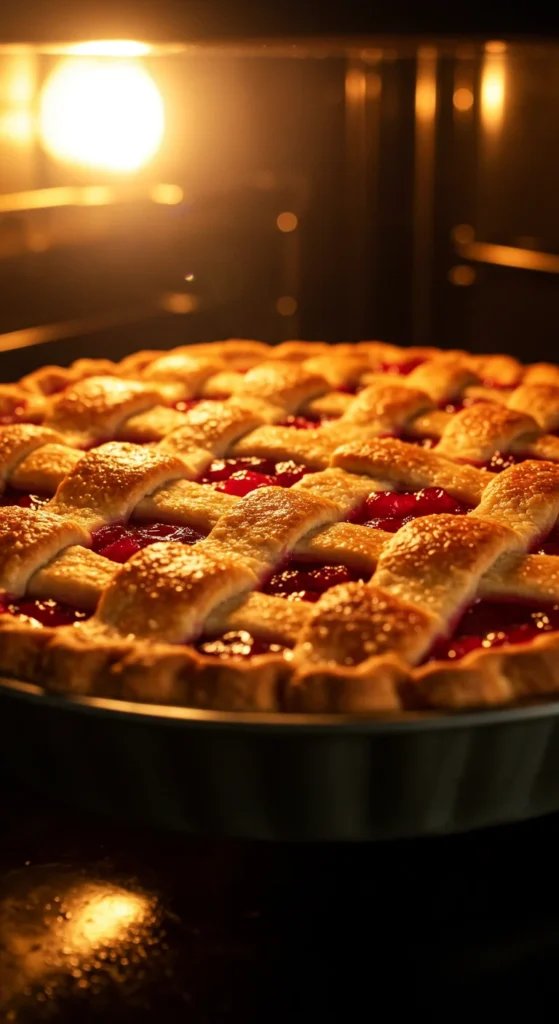
Step 4: Bake to Perfection
Timing and temperature matter more than you might think.
- Preheat your oven to around 375°F (190°C) for most pies.
- Start baking on the lower oven rack to ensure the bottom crust crisps up nicely.
- If the edges brown too quickly, cover them with strips of foil or a pie shield halfway through.
- Your pie is done when the filling bubbles through the vents and the crust is a rich golden brown.
Pro Tip: Let your pie cool for at least two hours before slicing. This allows the filling to set perfectly, preventing a runny mess.
Step 5: Presentation and Serving
Your pie deserves to be shown off!
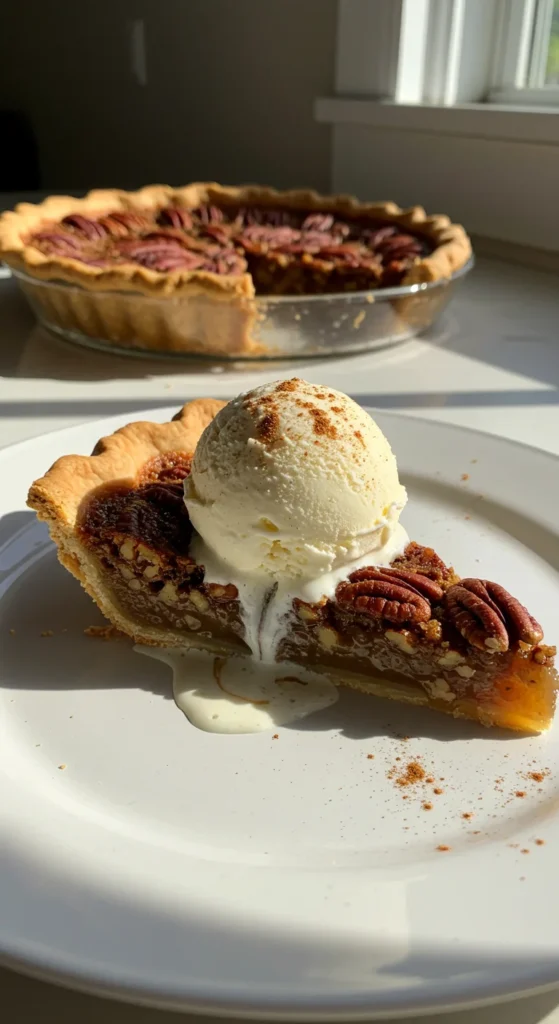
- Serve fruit pies slightly warm with a scoop of vanilla ice cream or a dollop of whipped cream.
- For cream pies, chill them completely for a clean, smooth cut.
- Use a serrated knife for slicing — it helps keep those crust edges neat.
Pro Tip: Dust the edges with powdered sugar or garnish with a few fresh fruits for a bakery-style presentation.
Bonus Tips for Pie Perfection
- Blind bake your crust (pre-bake without filling) if you’re making a cream or custard pie to prevent sogginess.
- Don’t rush cooling time — a hot pie is tempting, but patience makes it slice beautifully.
- Store leftovers covered at room temperature for fruit pies or in the fridge for cream pies.
Final Takeaway
Baking the perfect pie is part technique, part love, and part patience. Once you master your crust and balance your filling, you’ll never buy a store-bought pie again. Your guests will be wowed not just by how it tastes, but by how beautiful it looks coming out of the oven.
So preheat your oven, grab your rolling pin, and get ready to bake your next masterpiece — and don’t forget to save this recipe for later!

Leave a Reply