

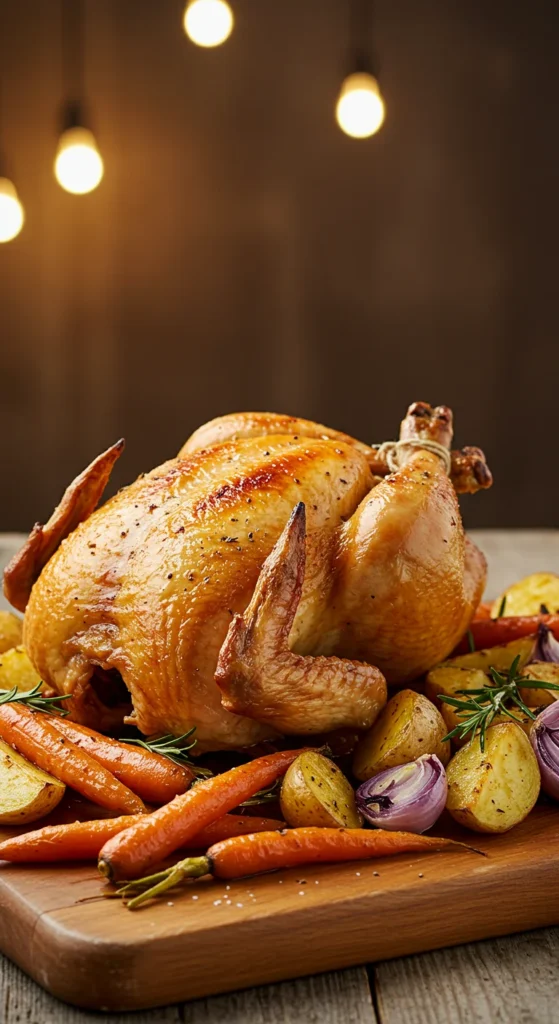
There’s something magical about the sight (and smell!) of a beautifully roasted chicken coming out of the oven — golden skin glistening, herbs crackling, and tender meat that practically falls off the bone. The good news? You don’t need to be a chef to achieve that perfect crispy, golden-brown roast at home. With the right prep, a few pro tips, and a little patience, you’ll have a chicken that looks (and tastes) straight out of a food magazine.
Step 1: Start with the Right Chicken
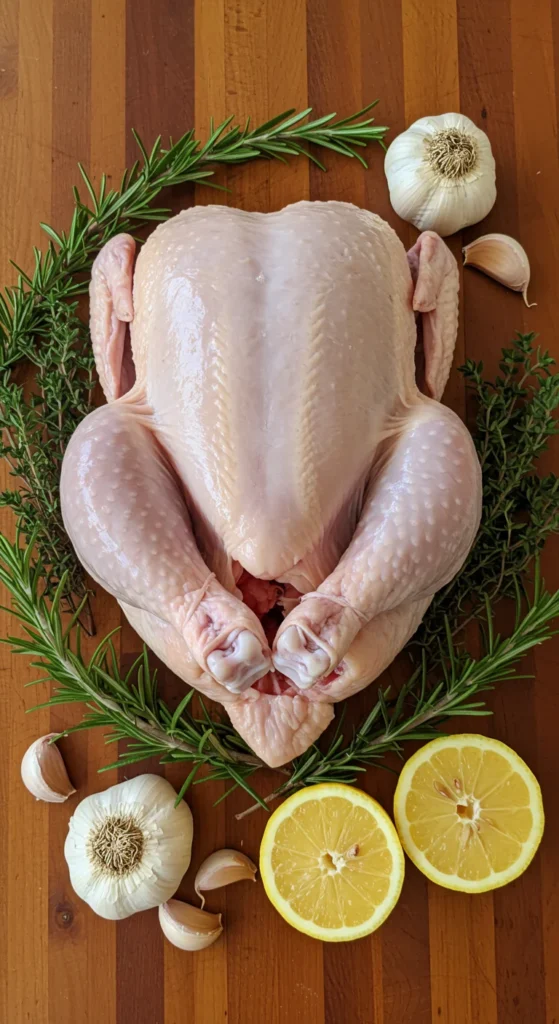
The secret to a perfect roast starts before you even turn on the oven. Choose a fresh, whole chicken that’s about 3–4 pounds — big enough to serve a family but small enough to cook evenly.
- Look for plump, firm skin and pinkish flesh.
- Avoid pre-seasoned or pre-brined birds — you’ll get better flavor control doing it yourself.
- If your chicken was frozen, make sure it’s completely thawed before roasting.
Step 2: Pat It Dry — Really Dry
Crispy skin starts with removing moisture. Use paper towels to pat the chicken completely dry, inside and out. Any moisture left will steam instead of crisping during roasting.
Here’s a bonus trick:
Leave the chicken uncovered in the fridge for 6–8 hours (or overnight). This air-drying step tightens the skin and helps it crisp beautifully in the oven.
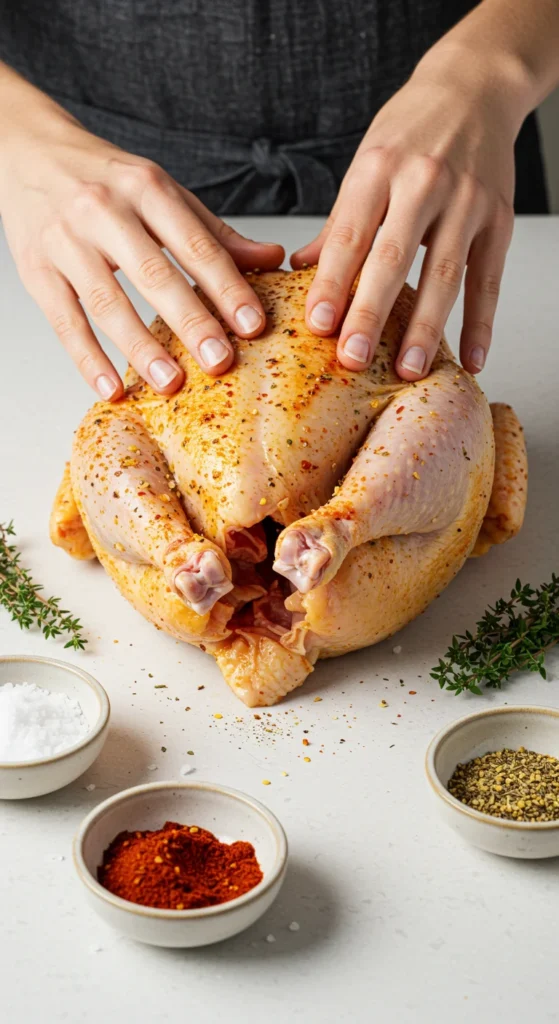
Step 3: Season Generously
A well-seasoned chicken is a flavorful chicken. Rub a generous amount of salt and freshly ground pepper all over — including under the skin if you can. Then, add your favorite aromatics for that restaurant-style flavor.
Try this classic seasoning blend:
- 2 teaspoons kosher salt
- 1 teaspoon black pepper
- 1 teaspoon garlic powder
- 1 teaspoon paprika
- 1 teaspoon dried thyme or rosemary
Massage the seasoning into every nook and cranny. Don’t be afraid to get your hands a little messy — this is where the magic begins!
Step 4: Add Flavor Inside
Stuffing the cavity isn’t just for show — it infuses moisture and aroma as the chicken roasts.
Tuck inside:
- Half a lemon
- A few sprigs of rosemary or thyme
- A few smashed garlic cloves
These ingredients release steam and perfume the chicken from the inside out, creating layers of flavor you can’t get any other way.
Step 5: Truss and Prep for the Oven
Trussing (tying the legs together with kitchen twine) helps the chicken cook evenly and keeps the juices locked in. You don’t need fancy skills — a simple tie at the ankles will do.
Next, brush the chicken with a light coating of melted butter or olive oil. This not only helps the skin brown but also gives it that irresistible crisp texture.
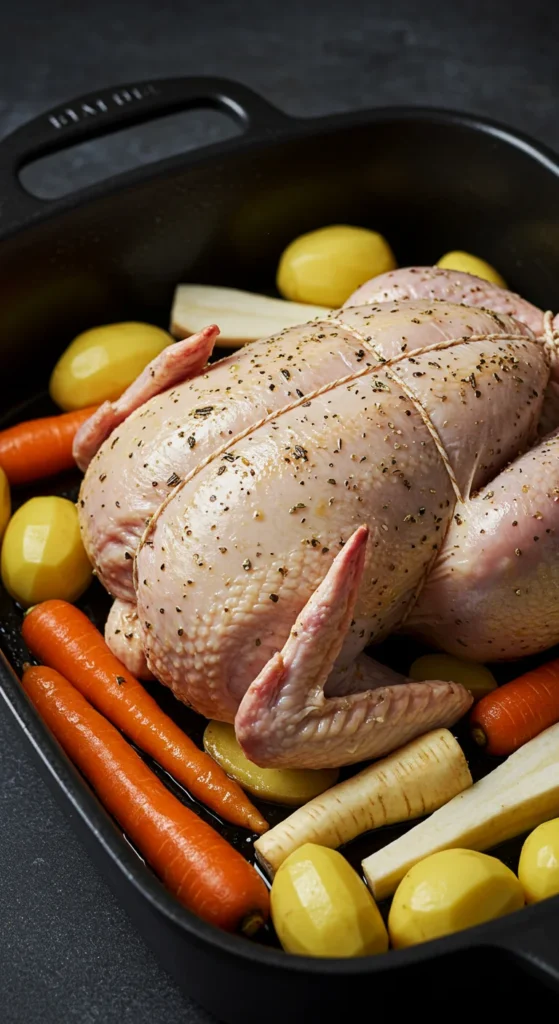
Step 6: Roast at the Right Temperature
Now for the most important part — cooking it right!
- Preheat your oven to 425°F (220°C).
This high heat helps the skin crisp up beautifully. - Place the chicken breast-side up on a rack in a roasting pan.
The rack allows air to circulate, ensuring even browning. - Roast for 1 to 1¼ hours, depending on size.
You’ll know it’s done when:- A meat thermometer inserted into the thickest part of the thigh reads 165°F (74°C).
- The juices run clear, not pink.
Step 7: Rest Before Carving
This step is crucial: Let your chicken rest for at least 10–15 minutes before cutting.
Resting allows the juices to redistribute, keeping the meat tender and moist.
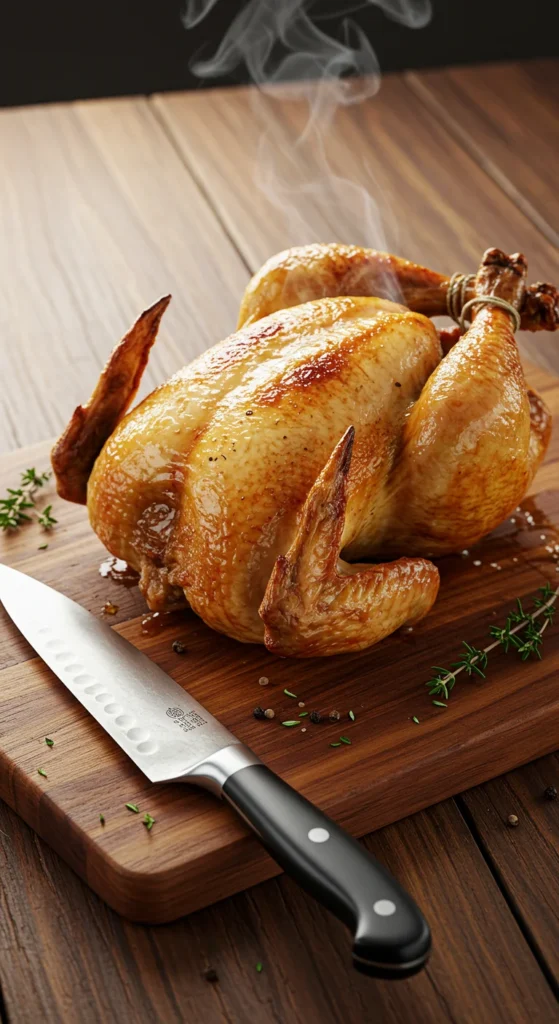
Step 8: Carve Like a Pro
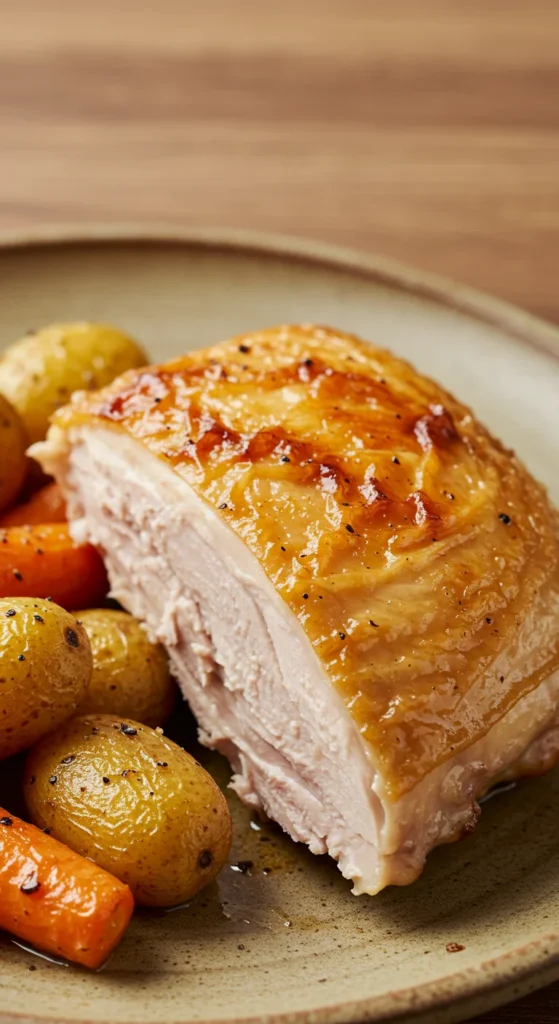
Use a sharp knife to separate the legs first, then the wings, and finally the breasts. Slice against the grain for the juiciest results. If you roasted vegetables under the chicken, drizzle them with the pan drippings — they’ll be bursting with flavor.
Bonus Tips for Extra-Crispy Skin
- Butter twice: Brush the chicken once before roasting, and again halfway through for an even deeper golden color.
- Use convection mode: If your oven has one, the circulating air will make the skin extra crispy.
- Don’t overcrowd the pan: Give your chicken space to breathe; crowded pans trap steam and soften the skin.
Final Thoughts
Roasting a chicken to crispy, golden perfection isn’t complicated — it’s about patience, good seasoning, and dry skin. Once you master the basics, you can experiment with different herbs, spices, and side dishes to make it your signature meal.
Your kitchen will smell heavenly, and your guests will think you spent hours making it (you won’t have to tell them how easy it really was).
Save this recipe for later — your next Sunday dinner will thank you!

Leave a Reply