

If there’s one dessert that never fails to please a crowd, it’s a pan of rich, fudgy brownies fresh from the oven. Whether you like them slightly underbaked and gooey or firm with a crackly top, there’s a certain magic in that deep chocolate flavor and melt-in-your-mouth texture that makes brownies utterly irresistible. The best part? You don’t need fancy ingredients or professional baking skills — just a few clever tricks to turn simple ingredients into pure chocolate heaven.
Gather Your Brownie Essentials
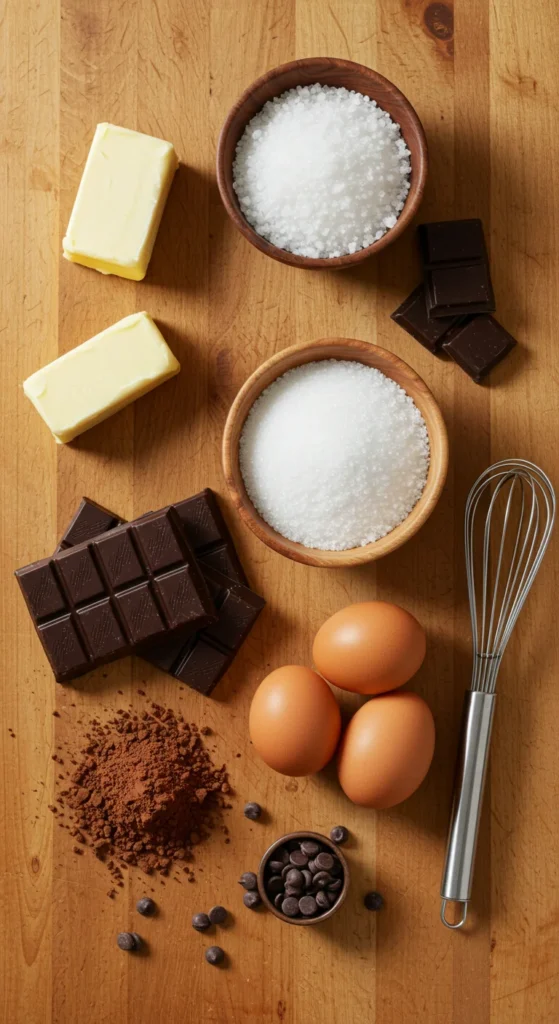
Before you dive in, make sure you’ve got everything ready. The key to the perfect brownie is balance — the right ratio of butter, sugar, eggs, and chocolate.
You’ll Need:
- 1 cup (2 sticks) unsalted butter
- 8 oz semi-sweet chocolate (bars work better than chips)
- 1 ½ cups granulated sugar
- ½ cup brown sugar
- 3 large eggs + 1 egg yolk
- 1 teaspoon vanilla extract
- ¾ cup all-purpose flour
- ¼ cup cocoa powder
- ½ teaspoon salt
Optional add-ins:
- Chopped walnuts or pecans
- Chocolate chunks or white chocolate chips
- A swirl of peanut butter or Nutella
Step 1: Melt the Chocolate and Butter
Start by combining butter and chopped chocolate in a heatproof bowl. Set it over a pot of simmering water (double boiler style) and stir gently until smooth and glossy.
You can also melt them in the microwave in short 20-second bursts — just be careful not to overheat.
Once melted, remove from heat and let it cool slightly. You don’t want to scramble your eggs later by adding them to piping hot chocolate.
Pro Tip:
Use high-quality chocolate bars instead of chips. Chocolate chips are designed to hold their shape, so they won’t melt as smoothly.

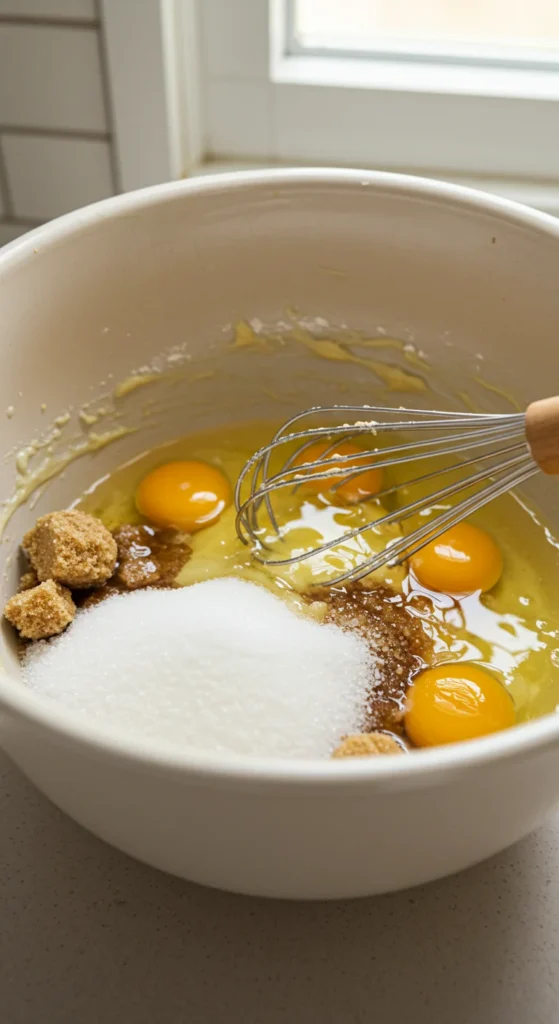
Step 2: Whisk in the Sugars and Eggs
Now, whisk in the granulated and brown sugars until fully incorporated. This step gives your brownies that signature crackly, shiny top.
Next, add the eggs and the extra yolk one at a time, mixing after each addition. Stir in the vanilla extract for that warm, bakery-style aroma.
Texture Tip:
Whisking the eggs well adds air — essential for chewy edges and a slightly lifted top.
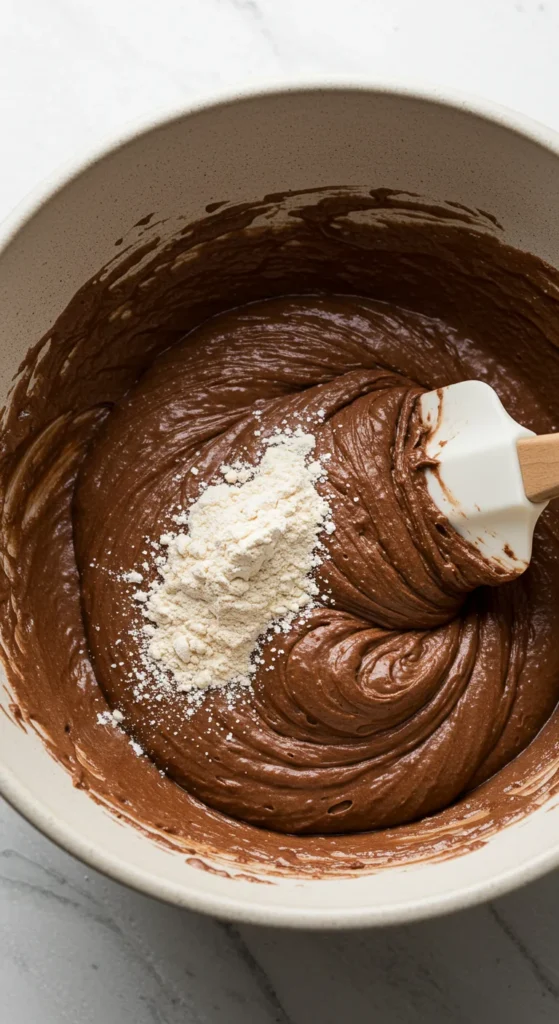
Step 3: Fold in the Dry Ingredients
Sift together flour, cocoa powder, and salt. Gently fold this mixture into your wet ingredients using a spatula. Avoid overmixing — just stir until no streaks of flour remain. Overmixing can make your brownies cakey rather than fudgy.
If you’re adding nuts, chips, or swirls, now’s the time to fold them in.
Step 4: Bake to Perfection
Pour the batter into a parchment-lined 8×8-inch baking pan and spread evenly. Bake in a preheated oven at 350°F (175°C) for 25–30 minutes.
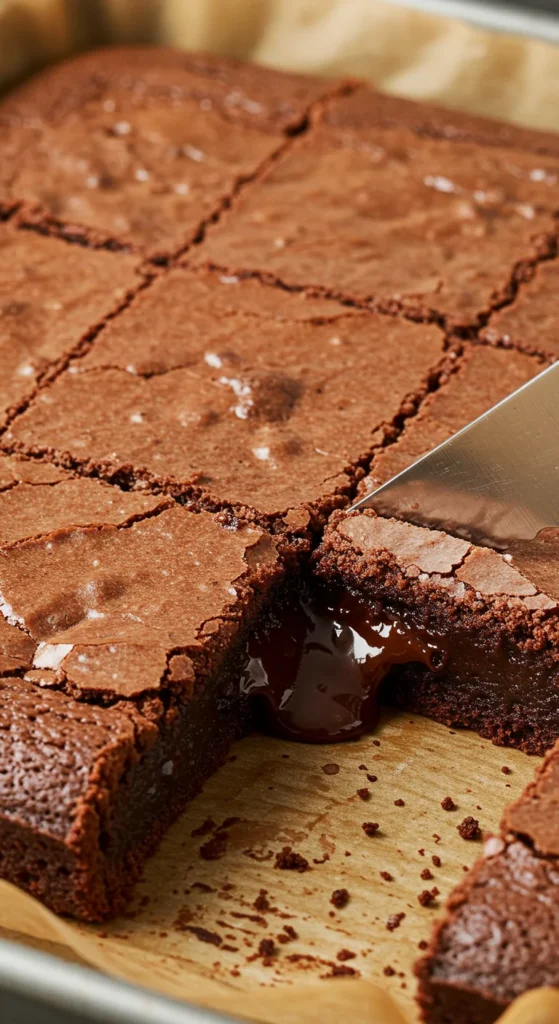
The edges should be set, but the center should still look slightly underbaked — that’s what gives you that dreamy, gooey texture once cooled.
To test doneness, insert a toothpick about two inches from the edge — it should come out with a few moist crumbs.
Let the brownies cool completely before cutting (the hardest part, we know!). Cooling allows the fudgy texture to firm up and the flavors to deepen.
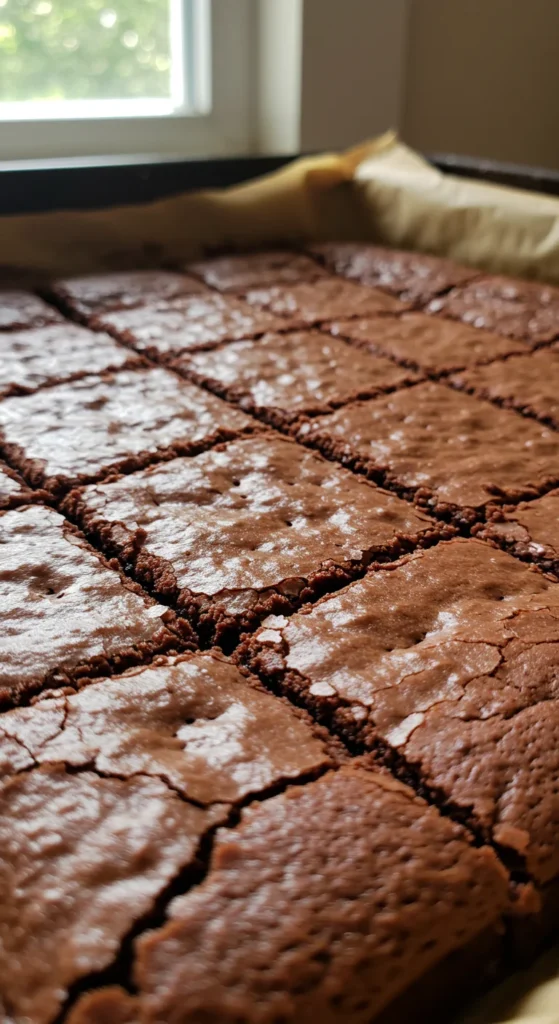
Step 5: Slice, Serve, and Enjoy
Once cooled, lift the brownies out of the pan using the parchment paper and cut them into neat squares or indulgent chunks.
For a café-style presentation, dust with cocoa powder or drizzle a bit of melted chocolate over the top.
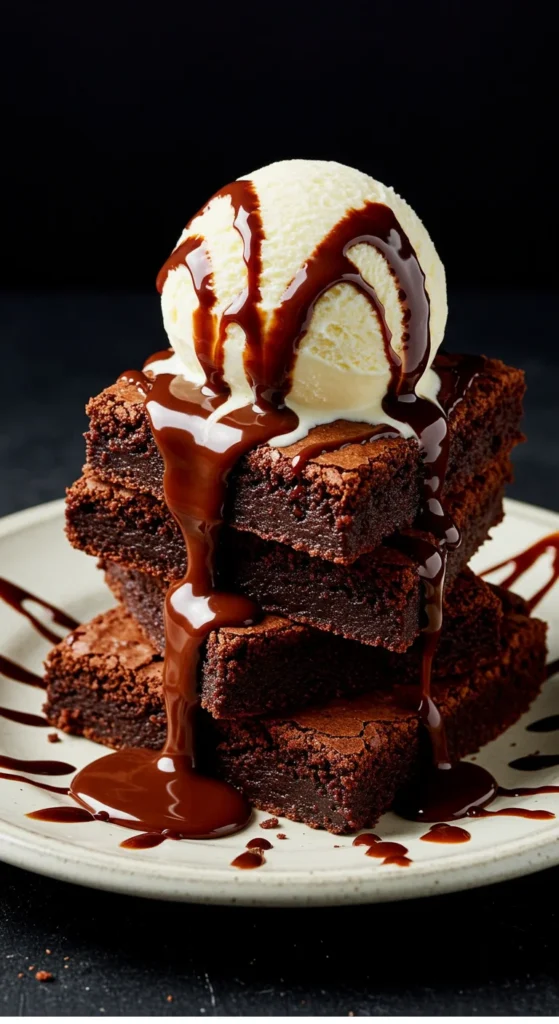
Serving Ideas:
- Top with a scoop of vanilla ice cream
- Add a drizzle of caramel or chocolate sauce
- Sprinkle with sea salt for a sweet-salty twist
Bonus Tips for the Best Brownies Ever
- Use room temperature ingredients: Cold eggs or butter can affect the texture.
- Don’t skip the brown sugar: It adds moisture and a subtle caramel note.
- Cool completely before slicing: Patience pays off for those perfect, clean cuts.
- Experiment with flavors: Add espresso powder for depth, or a hint of orange zest for brightness.
Final Takeaway
The secret to truly irresistible brownies lies in the balance of gooey, chewy, and chocolatey. Once you master this base recipe, you can easily tweak it to your taste — extra fudge-like, cakier, or filled with fun mix-ins.
So grab your whisk, melt that chocolate, and make your kitchen smell like a chocolate dream.
Save this recipe for later — your future self (and your sweet tooth) will thank you!
Leave a Reply